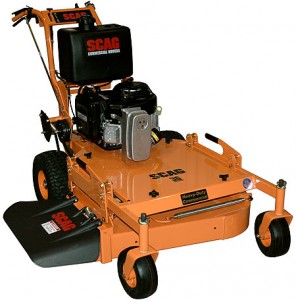
 Though Scag mowers come with some of the best blades in the industry, constant use in lawn mowing applications will eventually cause these blades to become dull. Additionally, unexpected interaction with debris can cause blades to bend or scratch, increasing the likelihood that they will rust or provide a rather inconsistent cut that simply doesn’t look as good as the cut produced by a new set of blades. This is a perfectly normal situation and one that can be easily resolved by simply installing new, OEM Scag blades onto the mower before the next mowing outing takes place.
Scag has made this process quite a bit easier than many competing models, with a few simple tools and procedures required to effectively remove the old blades and insert the new ones over the course of about half an hour. Be sure to have the right tools on hand, and the right safety measure in place, and this will be one of the easiest and most rewarding repairs done to the mower during its lifespan.
Safety Precautions: Don’t Risk Injury During a Blade Swap
Scag mowers are exceedingly safe, but maintenance procedures expose operators to a significantly increased risk of injury. That’s especially true with the mower’s blades, which are very sharp and can result in cuts, infections, or other injuries. Before beginning, make sure that the mower’s battery has been disconnected and that the spark plug wire has been removed. It may be a good idea to drain fuel and oil levels temporarily, or simply operate with extreme caution with moving the mower and adjusting its blades. Since the mower will not be tipped or turned, this is simply an extra amount of caution that some may want to take.
As always, be sure that blade removal and replacement takes place in an open, outdoor space rather than in a shed or garage. Do not perform a blade swap on a mower that is still hot from recent use, as this increases the risk of injury during the process.
Tools Needed to Get the Job Done
To avoid tipping the mower over, it’s important to have a floor jack available. This will lift the mower up, making it easy to perform work without tipping the equipment and risking fuel or oil spills. In addition to a floor jack, the following items will come in quite handy:
– Socket wrench
– C-clamp or Scag Blade Buddy
– Hex set
Step-by-Step: Swapping Old Blades with OEM Scag Replacements
Step 1: Get the Mower into Position
Perhaps the biggest component of the blade replacement is simply getting the mower prepared and into the right position to get the job done. Start by raising the mower’s deck in the highest position, and then removing the belt cover. Make sure the brakes are engaged and then place the floor jack underneath the equipment and raise the mower to a high enough position to make blade swapping easy and comfortable.
Be sure to block off the blades so that they don’t spin during removal. This can be done by attaching a c-clamp to the mower deck or by using a Scag Blade Buddy to cover the blades’ sharp edges while making contact with the interior of the mower deck and preventing movement.
Step 2: Remove Blade Hardware and the Blades Themselves
Each blade in the mower deck is secured in place using a series of hex nuts that are directly attached to the bolt that goes through the spindle area. Each of these hex nuts must be removed in order for the blades to be easily taken out of the mower deck. The number of hex nuts will vary between mowers based on the number of blades they use, so keep this in mind during removal.
Next, push the bolt through the Scag mower’s spindle assembly. Remove the bolt, the spacer, and the blade itself. Finally remove the washer and clear the area for a full replacement with new, OEM Scag blades.
Step 3: Install New Blades Underneath the Mower
Follow the instructions in step 2, but in reverse. Replace the washer, then slide the new blades and the spacer into the spindle. Feed the bolt through the spindle assembly and then tighten each hex nut onto its corresponding hex bolt with an impact wrench. Ensure that all of these hardware fixtures are tight and solidly in place before continuing.
Step 4: Prepare the Mower for Use
Remove the c-clamp or Blade Buddy and lower the mower back to the floor. Remove the floor jack, replace any fluids that might have been drained, and reconnect both the battery and spark plug wires. The mower is ready to go.
For OEM Mower Blade Replacements, Visit ScagOEMParts.com
Replacing mower blades is often required every few months or years, based largely on mowing conditions, local moisture content, and several other factors. When it’s time for a new set of blades to be put in place, ScagOEMParts.com can be trusted to have the right blades readily available and ready to ship. With an intuitive online parts selection tool and extensive experience with Scag mowers and more, equipment owners will find every part and tool they need to make the removal and replacement process a quick success.
